This isn’t a comprehensive how-to on lighting. This is just what I’ve learned while struggling to make lighting work for me. There are lighting sets in Daz Studio for people to play with; I haven’t tried those. There are also lighting atmospheres that color the environment in tones suitable for deep forest, corporate office, bedroom/boudoir, etc.; again, those are out of my realm of knowledge. And for this exercise, I’m not messing around with lighting temperature: all examples are set at their default 6,500 K.
As well, there are many excellent tutorials on how to get started in lighting and to refine your technique. Giantess Tina has written an excellent explanation of how lighting works and how to achieve various effects. RenderGuide covers the basics, explains all the settings, and then addresses complex multilight techniques. Think, Draw, Art! shows how to achieve very dramatic effects with multiple stages of lighting. Susan Coquin explores Iray lighting, explaining the settings in Daz Studio, and provides instructions to make your own “ghost lights.”
Most of that is beyond me. What I’m going to talk about here are five kinds of lighting, after you’ve shut off your headlamp:
- Dome and Scene
- Sun
- Point Light
- Primitive Sphere
- Mesh Lights
- Distant Light
- Spotlight
Dome and Scene

lighting01 – 1920×1280
render time: 2:21
lighting: dome and scene; rotation 0
This is just using the default lighting provided by the Dome and Scene setting in Environment. The primary lighting appears ahead of the subject and to our left, as evinced by her right hand’s shadow on her tank top. You can rotate the lighting as you need it. The lighting is bright enough to see everything but soft enough to gently illuminate the scene.
Sun

lighting02 – 1920×1280 “high noon”
render time: 1:23
lighting: sun – X:200 Y:1000 Z:400
Creating and using a sun for lighting causes dark, crisp shadows. This is done by creating a new null, going into Environment and changing the lighting to Sun, then selecting the null to be the sun. The sun behaves like any other object in the scene, and you can place it exactly where you want in Parameters. If there’s a way to change the intensity of the sun, I haven’t explored it.

lighting03 – 1920×1280 “sunset”
render time: 1:40
lighting: sun – X:200 Y:200 Z:1000
The cool thing about playing with a sun like this is that it performs like a sun: the lower it is on the horizon, the oranger/redder the light gets. In the image before this one, the sun hovered nearly directly overhead at ten meters; in this image the sun is only two meters high and ten meters ahead of the subject.
Point Light
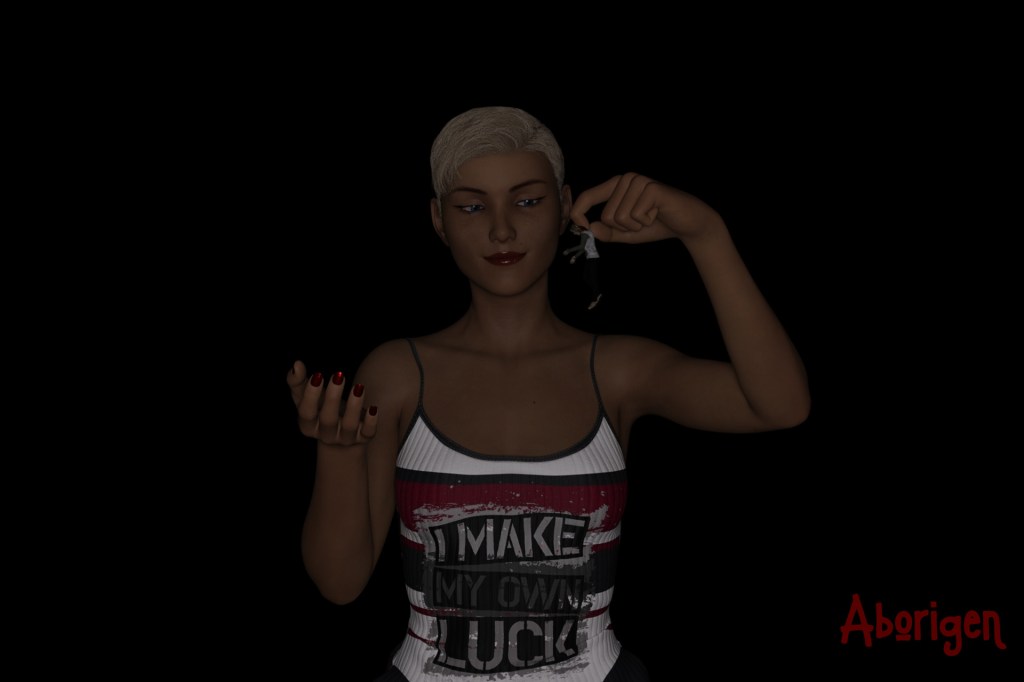
lighting04 – 1920×1280
render time: 0:40
lighting: point light – X:-15 Y:150 Z:35
Point light: lumen: 1500, temp: 6500
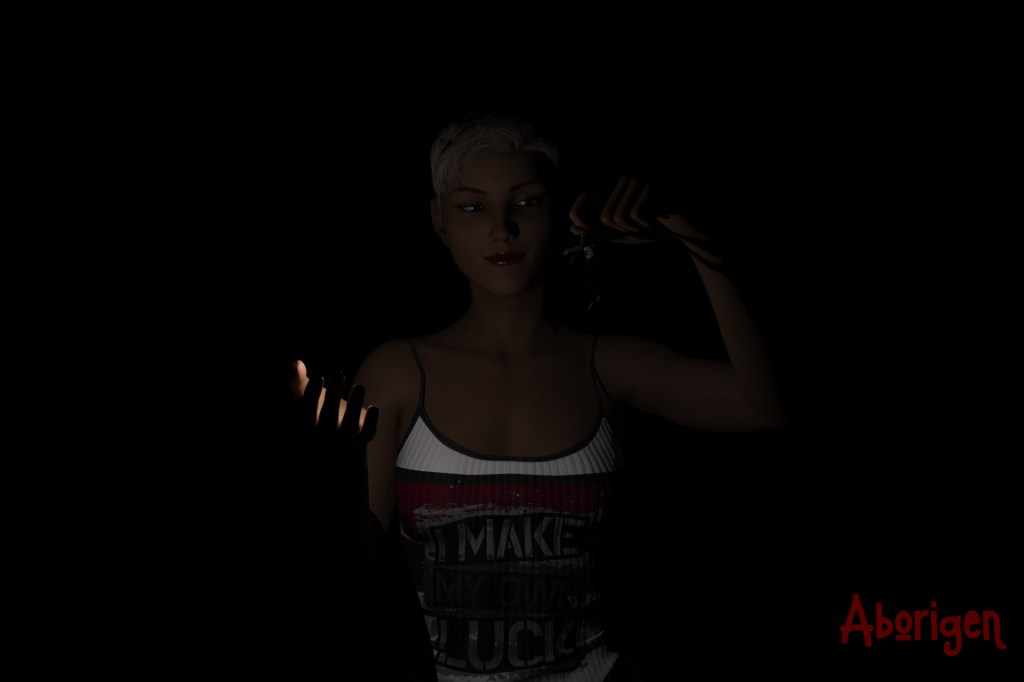
Just like creating a null for the sun, you can create a point light that sits invisibly within the render, unlike the primitive objects whose surfaces you can cause to emit light (see later). This little point of light is positioned to hover above her right hand and glow dimly at 1,500 lumen. Against a dark background, you can just make out the woman’s features, and you can definitely see her palm lit up.

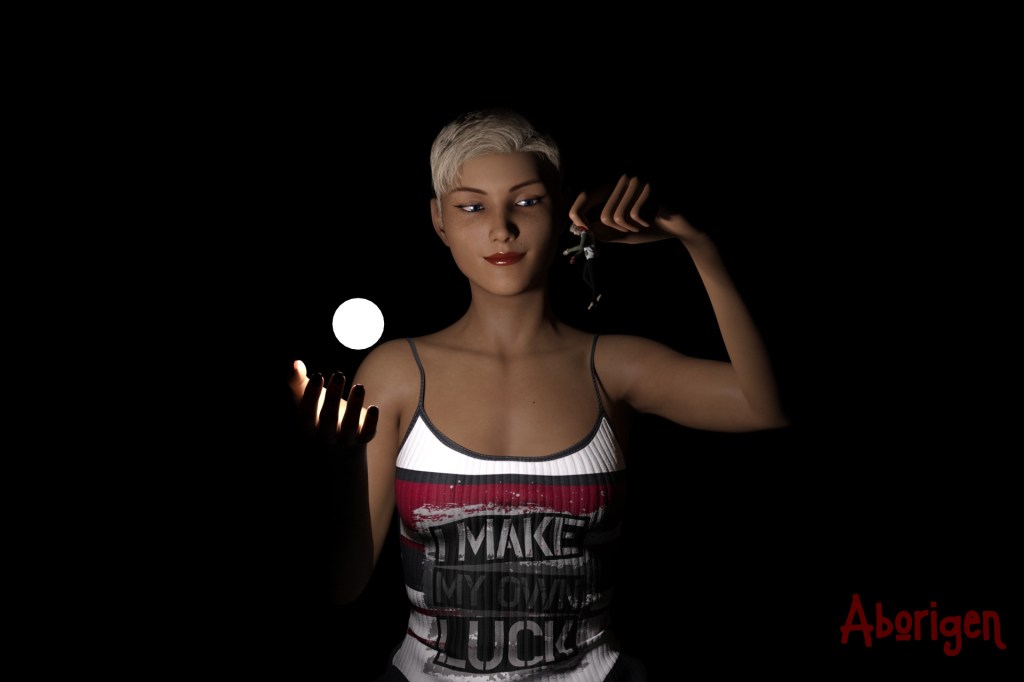
lighting05 – 1920×1280
render time: 1:34
lighting: point light – X:-15 Y:150 Z:35
Point light: lumen: 30,000 temp: 6500
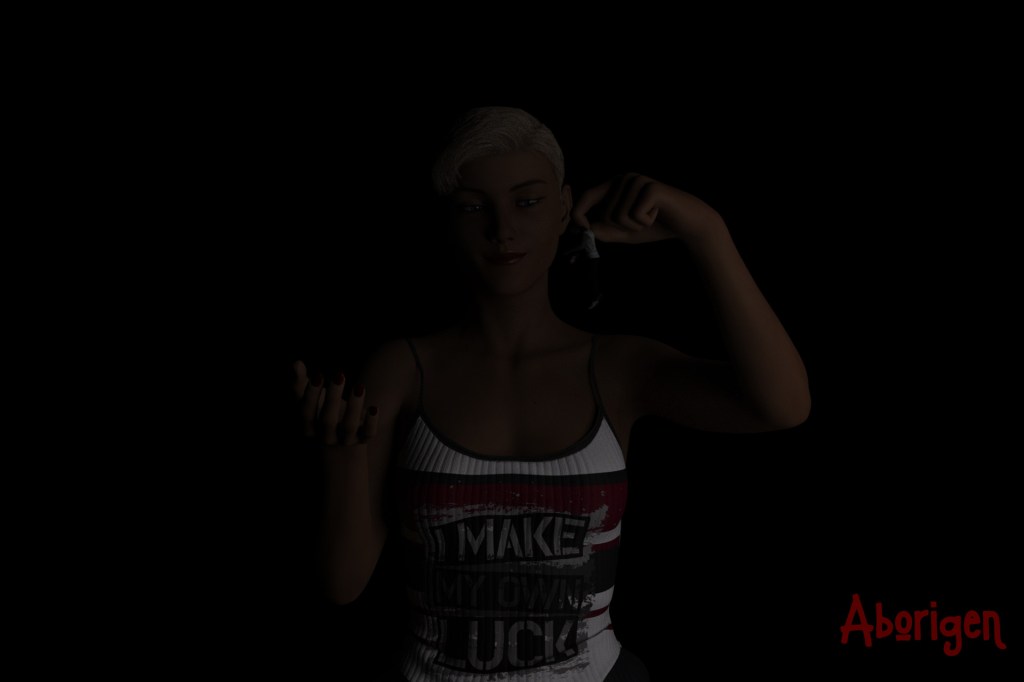
When I increase the lumens from 1,500 to 30,000, we can see dramatic improvements in lighting. Her face is visible and her palm is a brilliant white. Note the very sharp shadows her tiny captor casts against her left wrist. The point light is a useful tool because you can’t see it in scene, and you can create very striking visual effects after placing it precisely.
Primitive Sphere

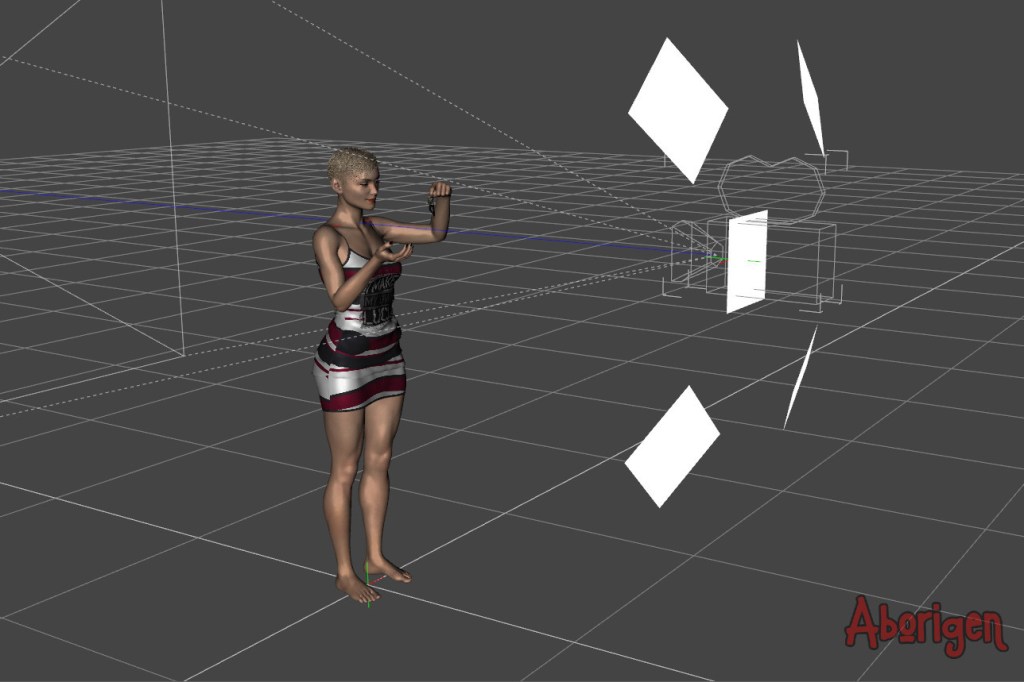
This is the arrangement I used to set up a primitive shape to glow: a sphere, one meter off the ground, one meter ahead of the woman, and one meter off to the side. The light source is fairly close, so let’s see how well using emissions on the surface of a sphere works for us.
lighting06 – 1920×1280
render time: 0:59
lighting: sphere: X:100 Y:100 Z:100
Sphere light: lumen: 30,000 temp: 6500
Jeez, we can hardly see anything at all. Even at this close distance, the sphere isn’t a great source of light. The point light created bright illumination at 30,000 lumen, but the sphere can’t produce as much light at that intensity, for some reason. Does the distance make that big a difference? Likely, but the sphere will show up in the scene if you let it, so it has to stay out of frame.
lighting07 – 1920×1280
render time: 1:03
lighting: sphere: X:100 Y:100 Z:100
Sphere light: lumen: 1,000,000 temp: 6500
That’s better. The sphere is at the same distance, but I’ve increased the lumens from 30,000 to 1,000,000. Now this seems more reasonable, the woman is clearly discernible. Notice how the shadows aren’t as crisp as they were with the point light: that’s because all the light came from one tiny little point before, whereas now a greater surface area (a one-meter sphere) is emitting light from all over.
Mesh Lights
I first got excited about mesh lights when I attained them for free with some preliminary set for Daz Studio. Later, Daz decided they wanted to sell that set and uninstalled it from my computer, but not before I studied the basic concept. Five primitive shapes, planes, set in a vaguely dish-shaped array and grouped to move as one unit.
These lights are set up dead ahead of the subject, and note how the center plane sits just behind the blue line representing where the camera “sees” the environment. If the plane were a little closer, the image would appear like nothing more than a flawless sheet of white.
lighting08 – 1920×1280
render time: 0:20
lighting: mesh lighting: X:0 Y:150 Z:160 (dead straight, behind camera)
mesh light light: lumen: 1,000,000 temp: 6500
Yet even though we’ve kicked the lumens up from 30,000 as a point light to 1,000,000 as a sphere, somehow five little glowing panes aren’t enough to light the woman adequately. The lights are only 1.6 meters away from the subject, too. Do the planes need to be bigger?

lighting09 – 1920×1280
render time: 0:50
lighting: mesh lighting: X:0 Y:150 Z:160 (dead straight, behind camera)
mesh light light: lumen: 10,000,000 temp: 6500
So I kicked up the lumens from one million to ten million, and now the scene is prettily lit. The array of five planes eliminates the crisp shadows—like the sphere did, but from a broader area over five planes. There’s something about this lighting that I like the best, out of all the images where there’s enough light.
Sphere, Again
lighting10 – 1920×1280
render time: 3:16
lighting: sphere: X:-15 Y:150 Z:35 (in her right hand)
Sphere light: lumen: 10,000,000 temp: 6500
Let’s go back to the sphere. Now I’ve intentionally put it into the frame, but I’ve shrunk it to a diameter of 0.05 meters. This exercise shows how I just do not understand lighting: the lumens have gone from 30K to 1M to 10M, and yet this little ball is barely adequate to cast the woman in dim light! What’s going on? I’ll need someone to explain this to me. Maybe it’s the volume/mass of the primitive shape, not just the surface area?
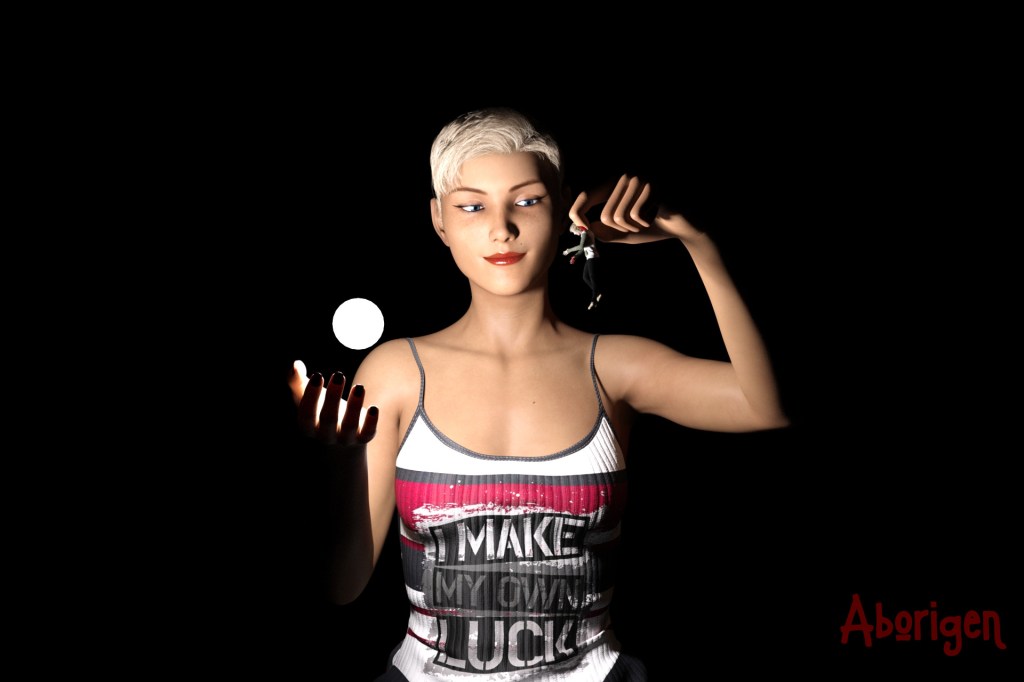
lighting11 – 1920×1280
render time: 5:57
lighting: sphere: X:-15 Y:150 Z:35 (in her right hand)
Sphere light: lumen: 50,000,000 temp: 6500
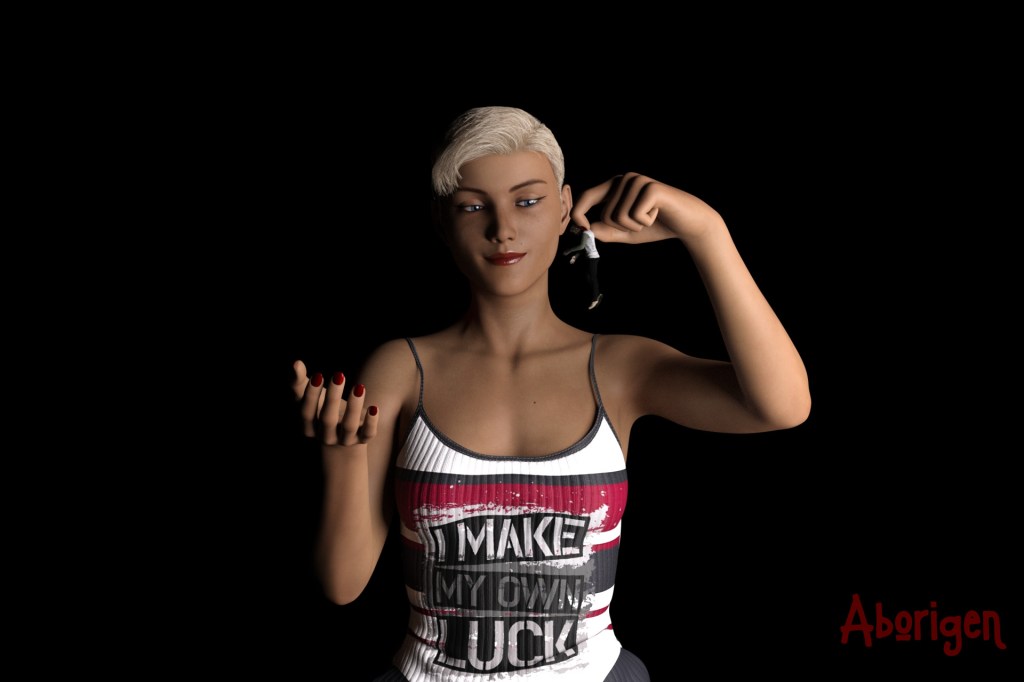
Now that I’ve cranked the lumens up to fifty million, yes, now the sphere provides enough light once again. The shadows are very dark due to the high value, but a little fuzzy around the edges because of the extra surface area (relative to a point light). Her face is a little washed out, her chest is sufficiently lit, and her forearms disappear into the dark background. This is a useful but specific effect, like if someone’s about to eat a lightbulb or a sun, I suppose. For this reason, when I’m creating light with primitive objects, I find it convenient to change Luminance Units from cd/m^2 to kcd/m^2. You type slightly fewer numbers that way.
Distant Light
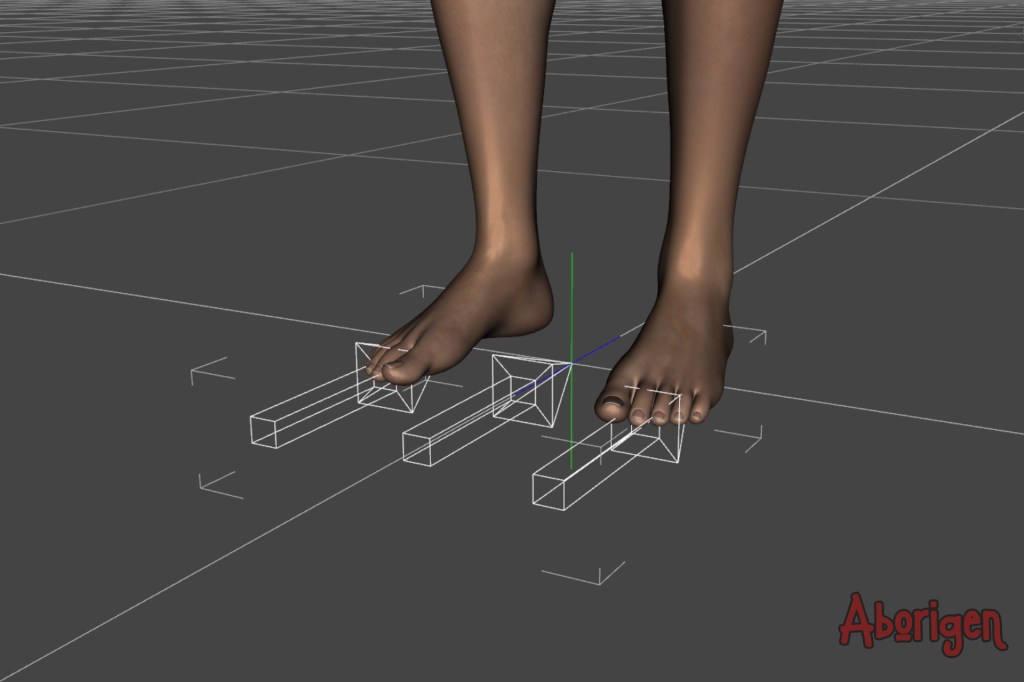
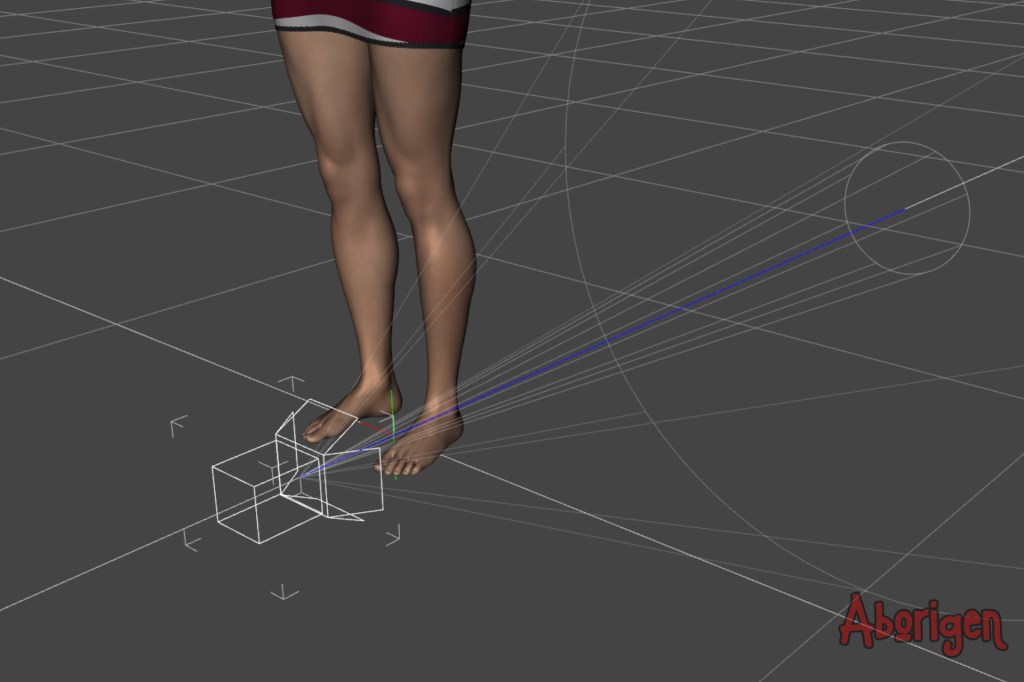
When you open a new distant light, you’re immediately presented with three parallel arrows pointed in the direction of 0/0/0 in your modeling grid. What this represents is which direction the light is coming from.

lighting12 – 1920×1280
render time: instant
lighting: distant light: X:0 Y:0 Z:0
distant light: lumen: 1500 temp: 6500
Once again, the photometrics start out at 1500 lumen and a temperature of 6500 K. I don’t know why, because this is far too dim for anything to be seen by. Can you just barely make out the ghostly image of my model’s feet and shins? That is the light shooting flat across the horizon at her. Needs improvement.

lighting13 – 1920×1280
render time: 2:12
lighting: distant light: X:0 Y:0 Z:0
distant light: lumen: 250,000 temp: 6500
I haven’t raised the light direction, only returned to the normal camera position. Light is still shooting at her parallel to the modeling grid from some indefinite source: it’s purely mathematical here, a steady flow of photons without a defined source, and the shadows that result from that. Look how dark and crisp they are, just like the point light. You’d think that a wide field emitting light, like the surface of a one-meter sphere, would diffuse the edges of the shadows, but that is not the function of distant light!
However, the drawback is that the lights must be at least parallel to the ground or pointed down at it. I tried to direct some low-angle lighting up at the woman, and because the ostensible light source was under the floor, it was therefore occluded by the floor and the scene was shrouded in darkness. I didn’t try removing the floor, that would’ve been good science. It didn’t occur to me, I just moved on.
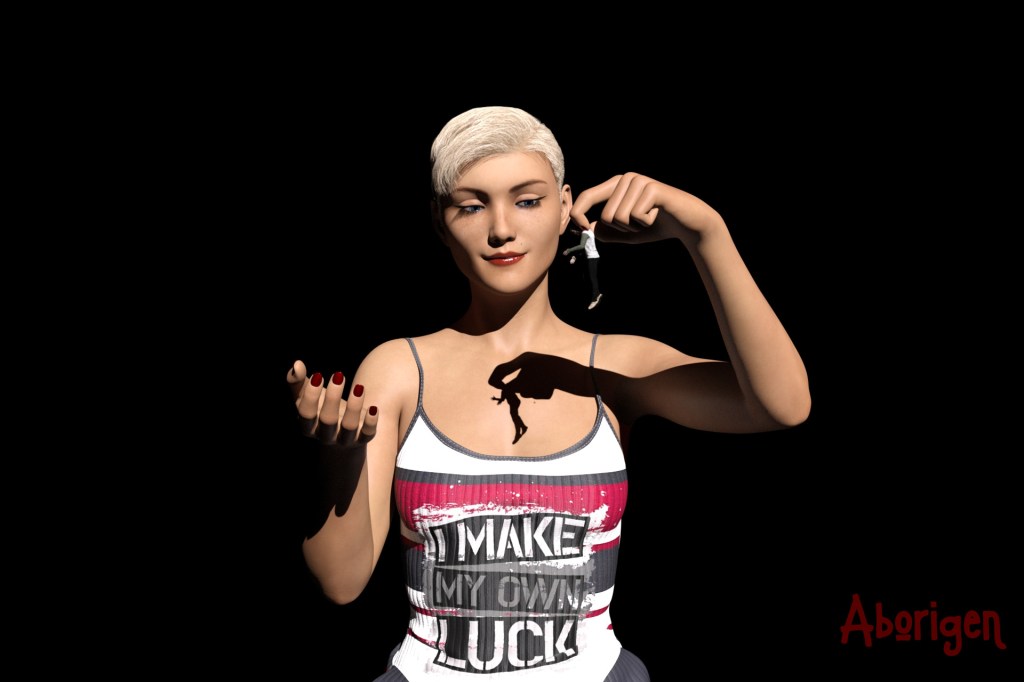
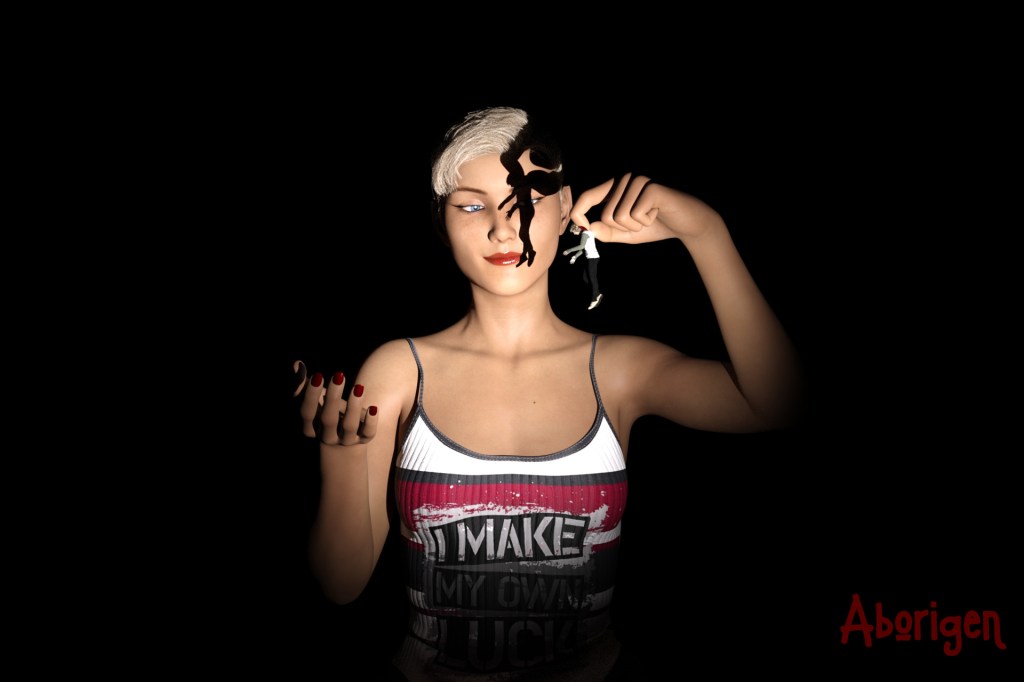
lighting14 – 1920×1280
render time: 3:11
lighting: distant light: X:28.92 Y:203.21 Z:99.96
X Rotate:-31.55 Y Rotate:16.88 Z Rotate:0
distant light: lumen: 250,000 temp: 6500
I’ve elevated those parallel arrows to shine down at my model, casting a sharp silhouette of her tiny man upon her bosom. (In literature, this is what we call “foreshadowing.”) The light is very bright at 250,000 lumens, and I had to toy around with that number before finding an effect I liked.
Distant light would be a good replacement for Sun if what you want is dark shadows with no hazy edges.
Spotlight
When you select spotlight, this little lamp appears, shooting directly across the floor in a wide spray. The fun thing about spotlight is that it functions just like it says: you can select it as a perspective, and you can point it wherever you want for a limited pool of light upon your subject. It’s also useful for dramatic lighting in other settings, I imagine: someone being caught in headlights, dramatic lighting inside someone’s house, etc.
lighting15 – 1920×1280
render time: 0:56
lighting: spotlight: X:0 Y:0 Z:91.85
spotlight: lumen: 50,000 temp: 6500
The first thing I did, in fact, was evoke the spooky ghost-story-telling effect of a flashlight shining up from below a person. I futzed around until I found a degree of lumens that I liked—50,000 in this case—and as it shown from her feet, it bathed the upper half of her in a dim white light. Note the nice dark shadow cast by her nose. If the shadows have sharp edges, it’s because of how close the light is. Pull back, and the light quickly gets dimmer, the illumination more spread out and uniform.
lighting16 – 1920×1280
render time: 0:47
lighting: spotlight: X:24.39 Y:140.47 Z:89.01
X Rotate:9.83 Y Rotate:20.97 Z Rotate:0
spotlight: lumen: 50,000 temp: 6500
Here, you can see how it really does resemble a powerful flashlight: the spotlight is about a meter away from the model. It’s pointed at her head (you can adjust this through the spotlight’s perspective, or step back into the Perspective view and adjust the camera from without), forming a brilliant white pool on her face and throwing the shadow of her tiny man over one eye. Down toward her midriff, the pool of light doesn’t extend that far and her legs are in darkness. If I pulled the light farther back from the woman, she would appear in dimmer light and there would be more of it over the length of her body.
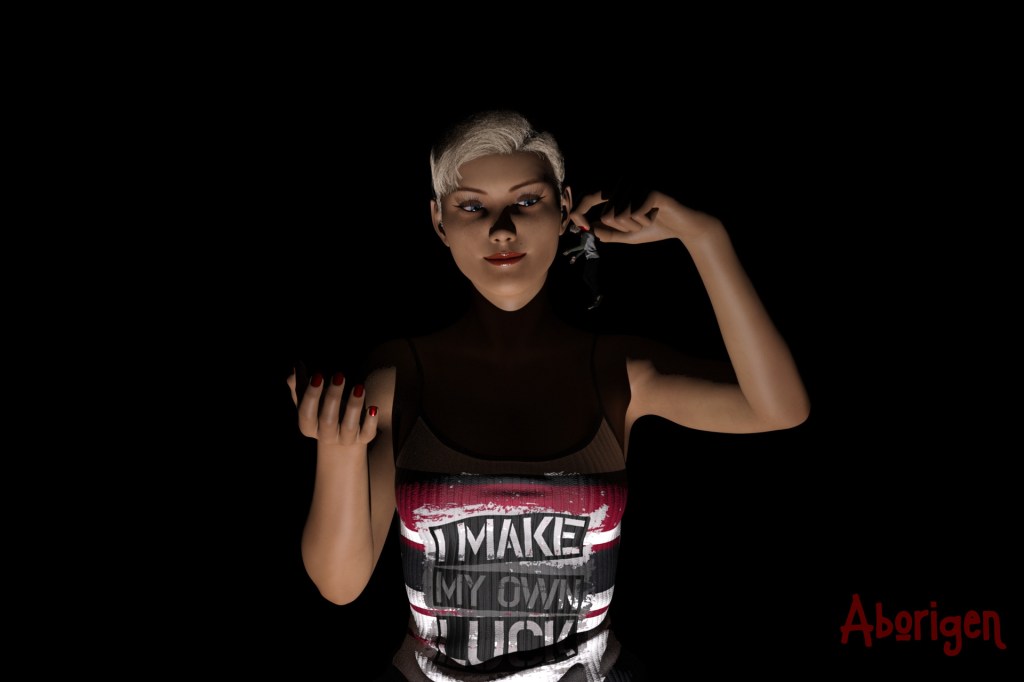
Linear Point Light

I have no bloomin’ idea what linear point light does. There’s some conversation on the Daz forum about it from 2012, and the people who understood it explained it in strictly technical jargon. Any helpful video Daz may have posted nearly a decade ago has been taken down, as far as I know. I can’t appreciate what specific effect it may achieve, compared with point light. In fact, it resembles point light in any practical way I could see, in the few minutes I played around with it.
But I did make this cool picture by lodging the light in the woman’s chest. The models are hollow, of course, so you can do this.
And that’s it for my rundown of playing around with light! In another post I’ll futz around with other photometrics and detail my findings, outline my guesses. If you have questions, I probably can’t answer them but you’re welcome to start the conversation.

Leave a comment